Installation
Compatibility
info
Supported in iOS 11 and above.
| LAN | AWDL | Bluetooth | |
|---|---|---|---|
| iOS | ✓ | ✓ | ✓ |
| macOS | ✓ | ✓ | ✓ |
Setup
- Open your Xcode project and select the "File" > "Add Packages..." menu entry. Enter the following package URL in search box in the upper right corner:
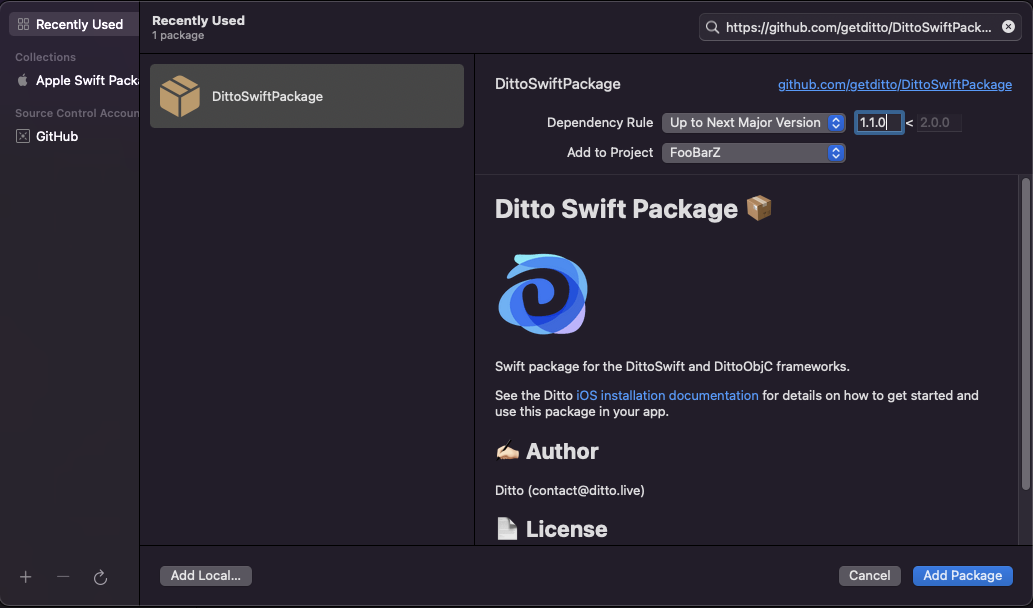
See Adding Package Dependencies to Your App for more details on this dialog.
- Click the "Add Package" button.
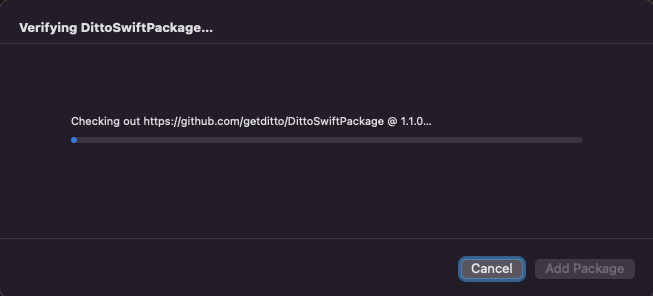
Xcode will take a minute or two to download the Ditto package.
- Select the package product(s) you want to use in your app.
- Make sure to select both "DittoSwift" and "DittoObjC"
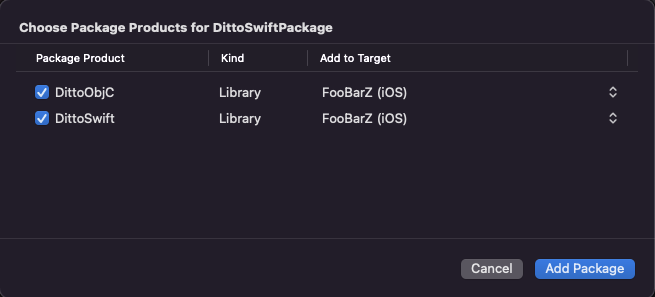
Click the "Add Package" button.
- Ensure you have CocoaPods 1.1.0 or later
- Ensure you have
use_frameworks!in your Podfile - Add the following to your Podfile like so:
pod 'DittoSwift', '=4.4.5'And run pod install --repo-update to install the latest versions.
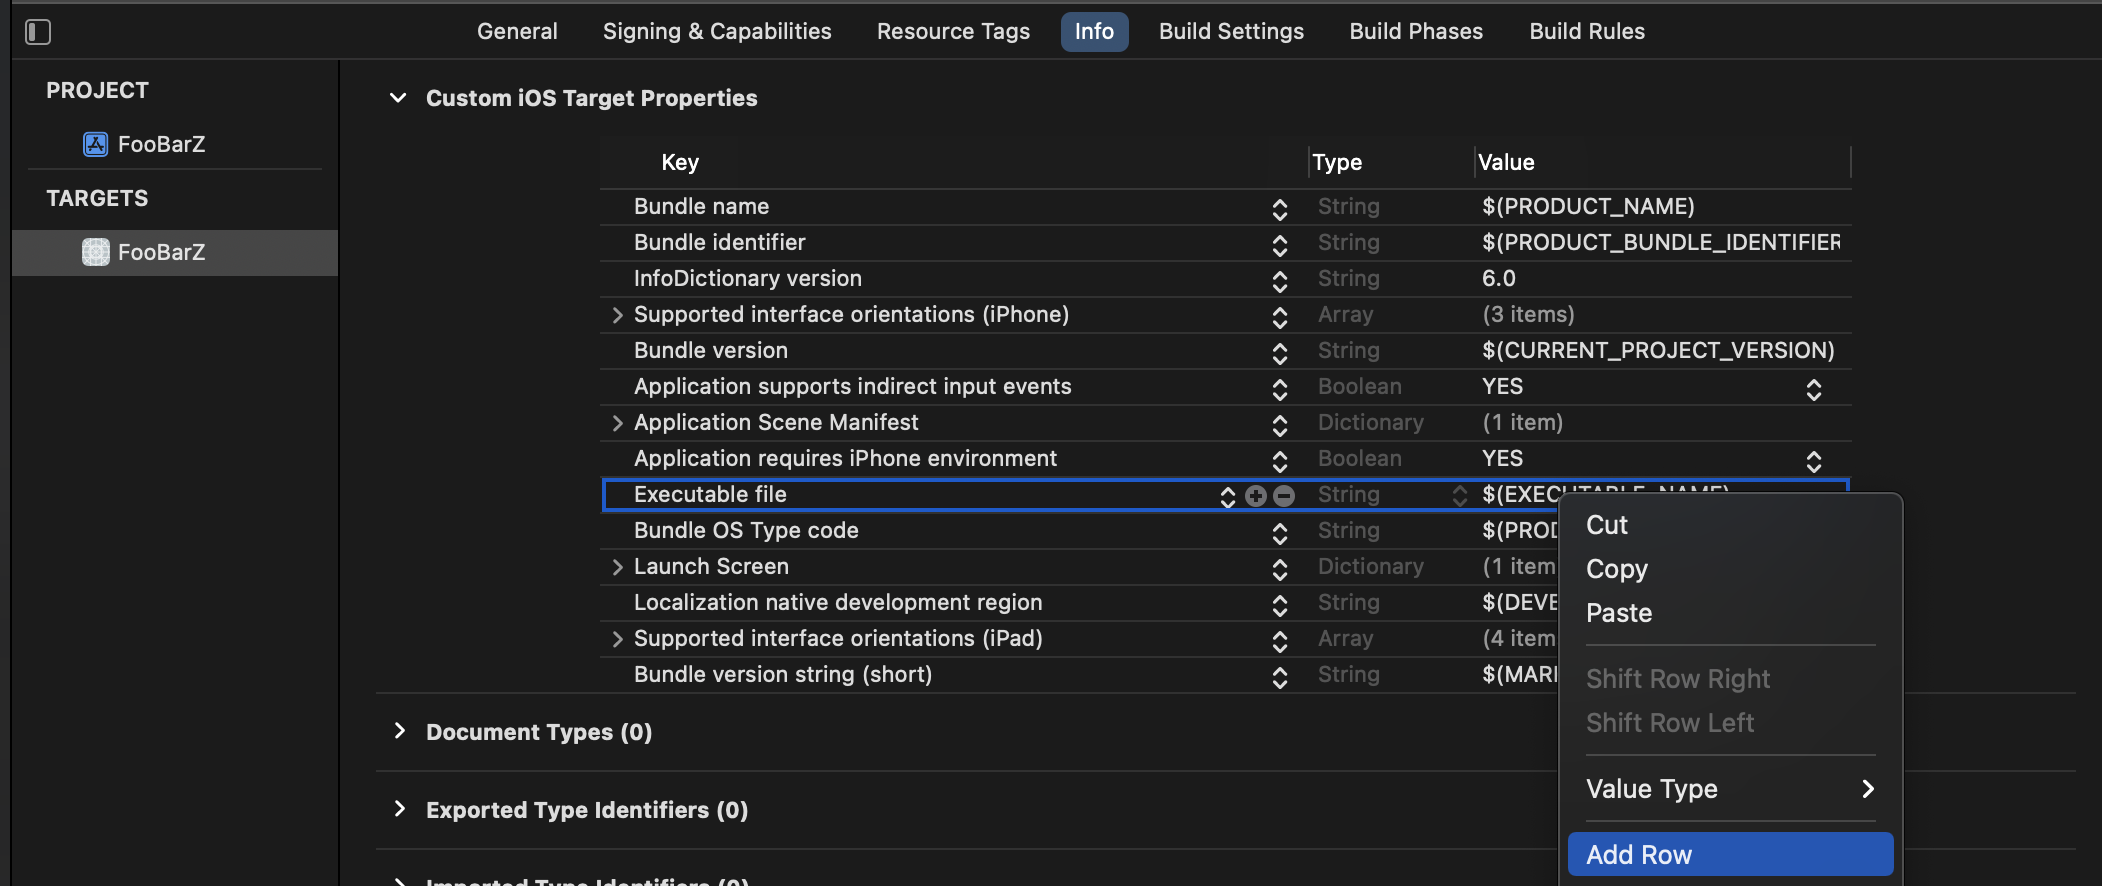
- Navigate to your App's Target and go to the Info tab and right click on any row and Add Row.
Platform permissions
Q: Why does Ditto need iOS Platform Permissions?
Ditto attempts to use all the available networking capabilities of your device to locate and sync with other users of your app. This includes standard Wi-Fi (which we often refer to as LAN or Local Area Network) and peer-to-peer functionality such as AWDL and Bluetooth Low Energy.
iOS restricts access to some of this functionality for the sake of user control and privacy. To unlock the full capabilities of Ditto, it is important to configure your app so that it requests all the permissions that it needs. These permissions are only asked once when you attempt to start the synchronization.
Since iOS 13 and Xcode 11 an app must ask the user's permission to use Bluetooth. However, Ditto will activate Bluetooth by default, which means the user will receive a permission prompt automatically. In addition, since iOS 14 an app must ask the user's permission to use the Local Area Network to discover devices.
- Privacy - Local Network Usage Description
- Privacy - Bluetooth Peripheral Usage Description
- Privacy - Bluetooth Always Usage Description
- A Bonjour service
_http-alt._tcp.
- Add the following values to your Info tab.
Key: NSBluetoothAlwaysUsageDescriptionType: StringValue: Uses Bluetooth to connect and sync with nearby devices
Key: NSBluetoothPeripheralUsageDescriptionType: StringValue: Uses Bluetooth to connect and sync with nearby devices
Key: NSLocalNetworkUsageDescriptionType: StringValue: Uses WiFi to connect and sync with nearby devices
Key: NSBonjourServicesType: StringValue: _http-alt._tcp.- Add the following keys to your Info.plist.
<key>NSBluetoothAlwaysUsageDescription</key><string>Uses Bluetooth to connect and sync with nearby devices</string><key>NSBluetoothPeripheralUsageDescription</key><string>Uses Bluetooth to connect and sync with nearby devices</string><key>NSLocalNetworkUsageDescription</key><string>Uses WiFi to connect and sync with nearby devices</string><key>NSBonjourServices</key><array> <string>_http-alt._tcp.</string></array>The values like Uses WiFi to connect and sync with nearby devices will be displayed in a prompt. Replace it with whatever language is best for your users.
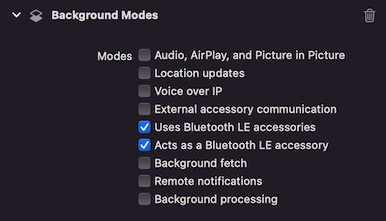
- Under "Signing & Capabilities", it is recommended that you turn on both Bluetooth Background Modes for your app target. If you enable these, iOS will often let your app sync while it is in the background or even while the phone is locked. This provides a better experience for users.
Access the portal to create a new app. Apps created on the portal will automatically sync data between them and also to the Ditto Big Peer. Each app created on the portal has a unique
appIDwhich can be seen on your app's settings page once the app has been created. This ID is used in subsequent sections to configure your Ditto instance.You can now use Ditto in your application:
DittoLogger.minimumLogLevel = .debuglet ditto = Ditto(identity: .onlinePlayground( appID: "REPLACE_ME_WITH_YOUR_APP_ID", token: "REPLACE_ME_WITH_YOUR_PLAYGROUND_TOKEN"))do { try ditto.startSync()} catch (let err) { print(err.localizedDescription)}Objective-C Support
Ditto supports native Objective-C applications. You need to build a bridge that calls into Swift from Objective-C. Look at the example project on GitHub to learn how to use DittoSwift in Objective-C apps.